How To Check Golf Cart Battery Charger?
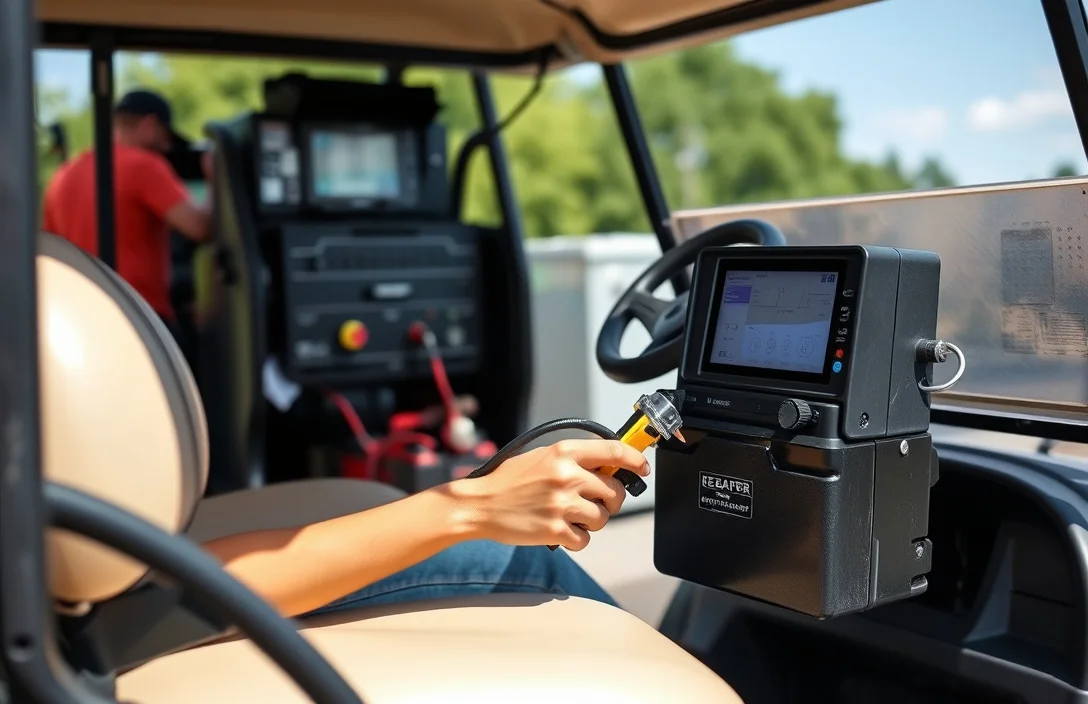
Power decision first, unplug and isolate the charger before testing. The spec that matters most is the charger output voltage, which must match your cart’s pack rating. A common mistake is counting the LED indicator as proof of charging. The first label to check is the DC output voltage at the jack with a multimeter.
Charger check starts with unplugging the unit, inspecting cables, and measuring the DC output with a multimeter set to DC volts. Readings should match the charger label within 0.5 V for common outputs like 12V, 24V, 36V, or 48V.
Essential Tools for Testing
A practical testing kit for golf cart charging systems starts with a digital multimeter, basic safety gear, and simple visual inspection tools. The multimeter confirms the charger’s output voltage and current, while gloves and glasses protect you during testing, and a flashlight helps you see tight corners.
Keep the work area dry, unplug the charger before opening panels, and use non-conductive tools where possible. These tools enable quick checks like voltage at the charger output, continuity to the input line, and a visual sweep for damaged cables.
| Item | Amount/Specification | Notes |
|---|---|---|
| Digital Multimeter | DC voltage & current, 0-100V range, 0.1V/0.01A resolution | Use on charger output and battery terminals. Set to DC mode; observe stable readings. |
| Clamp Meter (DC capable) | Current measurement around charger output | Helpful when a load is connected; verify current draw matches charger specs. |
| Battery Load Tester | Battery health under load | Useful to assess battery condition that may affect charging performance. |
| Safety Gloves | ISO-rated protective gloves | Wear when handling live cables or opening panels. |
| Safety Glasses | Impact-resistant eyewear | Protect eyes from sparks or debris during testing. |
| Screwdrivers (insulated) | Flat and Phillips | Access internal test points with the charger unplugged. |
| Non-conductive Flashlight | LED handheld flashlight | Illuminates tight areas for visual inspection. |
| Infrared Thermometer | Temperature reading on charger casing | Check for overheating during tests, note abnormal heat. |
| Test Leads & Alligator Clips | Rated for DC high current, insulated | Connect to meter and charger terminals; replace worn cords. |
Safety First: Precautions
Unplugging the charger before any testing is essential to prevent electrical shock and equipment damage. Ensure the charger is disconnected from both the power source and the golf cart to create a safe working environment.
Using protective equipment such as safety gloves and goggles protects against accidental contact with electrical components and potential injury from sparks or debris. Ensure that these items fit properly and are rated for electrical work.
Working in safe conditions involves ensuring that the testing area is dry, well-lit, and free of clutter. Avoid conducting tests in damp or wet conditions, as moisture increases the risk of electrical shock. Make sure to have all tools organized and easily accessible.
Always prioritize safety; the consequences of neglect can lead to serious injuries or equipment damage.
Visual Inspection Steps
Visual clues reveal most charger faults before electrical testing. Always unplug the unit and keep it dry while inspecting cables, housing, and contacts.
Testing Voltage Output
Voltage output checks confirm the charger regulates to the cart’s system voltage. Set a meter to DC volts, test across the output while the charger is plugged in, and compare the reading to the label on the charger or to the cart’s manual. Significant deviation indicates a regulation issue or a failing charger.
If readings are out of spec, verify connections, inspect cables for damage, and try a known-good outlet or charger to isolate the fault. Recheck after reseating connectors or replacing worn leads. When in doubt, consult the charger’s service manual before replacing components.
| System voltage | Nominal charger output | Notes |
|---|---|---|
| 36V | 36 V DC nominal | Output can rise above nominal during charging; verify against manual for exact targets. |
| 48V | 48 V DC nominal | Common in newer carts; final voltage may reach into the mid 50s depending on chemistry. |
Checking Amperage Output

Amperage output shows how much current the charger pushes into the golf cart battery during charging. Use a clamp-on meter around the charger output conductor, or a low-value shunt with a multimeter, to measure current while the system is energized. A steady reading within the charger’s labeled range confirms the unit is delivering as intended and helps spot under or over charging conditions.
Monitoring Charging Behavior
Properly monitoring a golf cart charger during operation can reveal its performance and detect potential issues. Observing the charging indicators, voltage levels, and signs of overheating provides critical insights into the charger’s functionality.
Regular maintenance of the charger is essential for optimal performance. Keep the charger clean and dry, store it in a cool, dry location, and periodically inspect for any signs of wear or damage to ensure longevity and reliability.
Common Charger Problems
A golf cart charger should deliver the labeled voltage with minimal heat. If the unit becomes unusually hot, or the output drifts during a charge, unplug and troubleshoot before continuing.
Overheating Issues
Overheating is often caused by excessive load, poor ventilation, or a failing component inside the charger. Begin by ensuring vents are clear, the unit sits in a well ventilated area, and the outlet and wiring are within spec.
| Symptom | Likely Cause | Action |
|---|---|---|
| Charger becomes very hot during charge | Overload or internal fault | Unplug, inspect, verify rating, and consider service |
| Charger hot but no output | Internal protection tripped or component failure | Unplug, check fuses if accessible, and service |
| Slow or no heating, but vents are hot | Ventilation issue not the primary fault | Improve airflow and re-test |
Inconsistent Charging Cycles
Inconsistent cycles occur when the charger stops early or runs too long, often due to battery state misreads, loose connections, or a faulty controller. Confirm pack voltage and inspect all power and data connections before testing deeper.
| Check | What it Means | What to Do |
|---|---|---|
| Fluctuating output | Possible contact resistance or failing regulator | Clean/adjust contacts, test stability with meter |
| Unreliable start/stop | Loose connections or defective control logic | Tighten connections, inspect wiring harness |
| Indicator lights behave oddly | Diagnostic code present | Refer to manual with code, perform recommended test |
Faulty Internal Components
Internal components can degrade or fail, including rectifiers, transformers, or the control board. Signs include no output, odd smells, or visible damage inside the unit. If you see any burn marks or smell ozone, stop using the charger immediately.
Safety reminder: never work on live electrical gear. If you are not confident with testing internal components, have a qualified technician service the unit.
Maintenance Tips for Longevity
Regular Cleaning keeps heat buildup and grime from masking warning lights. Unplug before cleaning, wipe with a soft microfiber cloth, and avoid liquids near the electronics. Check vent openings for dust and use a soft brush to clear any debris.
Proper Storage Practices reduce exposure to moisture and temperature swings that degrade electronics. Store in a dry, cool place away from direct sun and moisture, and keep the power switch off when not in use.
Routine Inspections catch problems before they affect charging performance. Do visual checks and test indicators regularly, and verify the output against the labeled spec when safe to do so.
| Check point | Target / spec | Why it matters | Action if out of spec |
|---|---|---|---|
| Output voltage | Matches label (for example 12V, 24V) | Incorrect voltage can undercharge or damage connected packs | Stop using and consult the manual or service |
| Cable integrity | No cracks, exposed conductors | Prevents shocks and shorts | Replace damaged cable |
| Ventilation | Vent slits clear | Prevents overheating | Clear obstruction, clean vents |
| Indicator lights | States align with manual | Shows charger state | Refer to the manual for codes |
Safety note: If you see swelling, heat, burning odor, or moisture around the unit, disconnect immediately and seek service from a qualified technician.
Quick Summary
To check a golf cart battery charger, verify output, inspect wiring, and confirm compatibility before each use.
Frequently Asked Questions
Question 1?
Check the charger label for the output voltage and current, and make sure it matches your golf cart battery pack. The charger output voltage must match your pack voltage on the label, and the current should align with your battery’s recommended charging rate. Also confirm the connector type and that the charger chemistry supports your pack (lead-acid or lithium).
Question 2?
Plug the charger into a live outlet, then use a multimeter set to DC volts to measure the voltage at the battery terminals or the charger output leads. Measure the charger’s DC output and compare to the label, and if there is no reading or it is far from the label, the charger may be faulty.
Question 3?
You should see a change in the battery voltage or a charger indicator light within a short period after plugging in. The voltage should rise toward the pack’s full voltage and the indicator should signal charging, and if the charger remains cool to touch and shows no change after 15 minutes, check connections.
Question 4?
Replace the charger if it fails the basic voltage test or shows visible damage to the cord or case. Replace when it fails to deliver the labeled output or has physical damage, and ensure you choose a charger compatible with your battery chemistry.
Question 5?
Avoid buying based on price alone; always verify voltage matches your pack and that the charger supports your battery chemistry. Verify the pack voltage and chemistry compatibility, check connector type and warranty, and beware cheap, generic chargers that do not list exact voltage.