How To Put Golf Cart In Reverse?
Brake safety is the first line of defense when putting a golf cart in reverse. The spec that matters most is the parking brake status. The most common mistake is shifting to reverse while the cart is moving. Before touching the F/R lever, confirm the brake pedal is pressed, the parking brake is set, the key is on, and the battery is above 50% charge. Clear the area.
Reverse engagement requires the cart to be stationary: press the brake, switch the key on, then move the F/R lever from Forward to Reverse while the cart is still. When complete, check that the reverse lights are on and the area is clear before easing off the brake.
Pre-Check Before Reversing

Engage the parking brake and confirm the cart remains stationary when you release the foot brake. With the key on and accessories powered, verify the battery indicator shows a healthy level and that the area behind the cart is clear of people, pets, and obstacles.
Safety reminder: Reversing focuses every driver’s attention, so confirm all bystanders are clear and avoid sudden throttle acts that could surprise others.
| Check | What to look for | Action if issue |
|---|---|---|
| Brakes | Parking brake indicators show engaged; cart does not roll when the foot brake is released | Address brake fault or service before proceeding |
| Power | Key ON, dash normal, no fault codes | Resolve electrical issue before reversing |
| Battery | Charge level acceptable, no warning lights | Charge or service if warnings appear |
| Environment | Area behind and around clear | Clear hazards or obstacles before reversing |
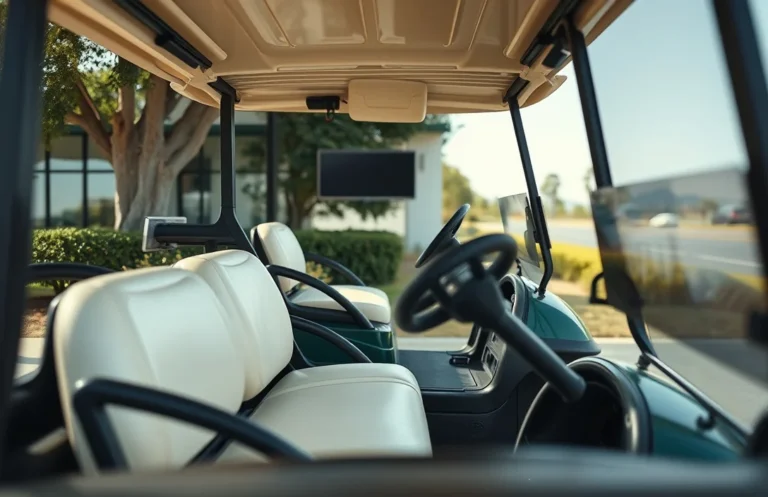
Using the F/R Control
Engaging reverse in a golf cart requires the proper use of the forward/reverse (F/R) control, typically located near the driver’s seat. To switch to reverse, ensure the parking brake is applied and the vehicle is at a complete stop before operating the control.
In practice, if the reverse does not engage after following these steps, check the battery charge level, as insufficient power may prevent the system from functioning correctly. If the F/R control feels unresponsive or sticks, inspect it for any obstructions or damage.
Understanding how the F/R system interacts with the controller is essential, as it regulates the cart’s movement direction. If the system fails or you experience persistent issues, consult a professional technician for a thorough inspection and potential repairs.
Post-Activation Checks
After engaging reverse in a golf cart, it is essential to perform several checks to ensure the cart operates correctly. Listening for unusual noises, testing reverse movement, and verifying safety interlocks are critical steps that help identify potential issues before driving.
Unusual noises during operation can indicate mechanical problems. Pay attention to any grinding, squeaking, or clunking sounds when the cart is engaged in reverse.
Testing reverse movement is a straightforward but crucial step. Make sure that the cart moves backward smoothly without hesitation or stalling.
Verifying safety interlocks is vital for safe operation. Many golf carts are equipped with safety features that prevent reverse movement unless certain conditions are met.
Check the following interlocks:
Conduct these checks regularly, especially after any maintenance or battery changes, to ensure the cart remains safe and reliable for use. If any issues arise during these checks, consult the owner’s manual or seek professional assistance.
F/R Control and Motor Interaction
The F/R control sends a directional command to the motor controller; the controller then sets the drive polarity and coordinates throttle and braking while enforcing safety interlocks. A proper sequence ensures the system won’t respond to the switch unless all preconditions are met.
Troubleshooting Reverse Issues
Reverse engagement problems usually come from safety interlocks, input switches, or a weak battery rather than a failed drive motor. Start with basic safety checks: confirm the brake is pressed, the parking brake is engaged, the key is on, and the battery pack shows an adequate charge per the cart’s manual. If any of these conditions are not met, correct them before deeper diagnostics.
Safety note: never bypass interlocks or force movement. If symptoms persist after these checks, consult the cart’s service manual or a qualified technician to avoid injury or further damage.
Maintenance Tips for Battery Health
Regular inspections catch loose terminals, corrosion, and water level issues before they cause performance loss. Frequent checks with tight connections help maintain consistent power for all golf cart operations.
Cleaning and maintenance of terminals and connectors prevents resistance buildup that accelerates corrosion and reduces performance.
Preventing corrosion requires controlling moisture exposure, using proper charging practices, and protecting connectors.
Safety note: Always disconnect the pack’s negative terminal first and wear eye protection when working near energized batteries.
| Symptom | Likely Cause | Recommended Action |
|---|---|---|
| Terminal corrosion visible | Electrolyte leakage or reaction with moisture | Clean, neutralize, and re-treat connectors; replace if pitting occurs |
| Voltage sag under load | Loose connections or sulfation | Inspect and tighten; perform balanced readings if available |
| Rapid heat during charging | Overcharging or faulty cell | Check charger settings; inspect pack; consider professional testing |
When to Seek Professional Help?
Persistent issues after troubleshooting, any sudden electrical fault, or safety concerns require professional service. A qualified golf cart technician can verify controller wiring, interlocks, and battery management system misfunctions that DIY checks cannot safely diagnose.
If you notice any of the following, arrange service rather than continuing to operate the cart:
If in doubt about a fault, treat it as a safety issue and contact service. Quick professional evaluation often prevents costly damage and dangerous outcomes.
| Symptom | Possible Cause | Recommended Action |
|---|---|---|
| Reverse engages only sporadically | Controller or interlock calibration drift | Professional diagnosis and possible recalibration or replacement |
| Brake interlock not releasing with key on | Interlock switch fault or wiring fault | Professional inspection and repair of switches/wiring |
| Burning smell or excessive heat near battery pack | Overcurrent, damaged cell, or loose connector | Power down, immediate professional service and possible component replacement |
Quick Reference Cheat Sheet
Engage reverse by confirming the brake is firmly applied, the parking brake is set, and the key is on. Confirm the battery state is healthy and the area behind the cart is clear, then shift the forward/reverse control to reverse and begin moving slowly.
Post-Activation Checks: After reversing, verify clear space, proper mirror alignment, and no fault indicators on the dash. Confirm the cart stops within a predictable distance and that safety interlocks remain functional before resuming forward movement.
| Situation | Likely Cause | Action |
|---|---|---|
| Reverse does not engage | Forward/Reverse switch or wiring fault, controller issue | Inspect the switch, test with a meter, check controller diagnostics; replace or service as needed |
| Cart moves forward when reverse is selected | Reverse interlock malfunction or controller misread | Check interlock wiring, recalibrate if available, and test with the switch |
| Indicator shows reverse but no motion | Low battery or weak pack, motor fault | Charge battery, recheck voltage, and perform a system reset; if persists, service |
| Unusual noises or heat during direction change | Drivetrain binding, lubrication needed, or loose components | Inspect drivetrain, apply manufacturer-approved lubrication, tighten fittings; stop if unsafe |
Battery health and charging considerations: Reversing performance depends on available torque, so ensure the pack is in good condition. If packs are aged or frequently drop voltage, the cart may hesitate or stall in reverse; plan charging and state of health checks as part of routine operation.
In practice, treat direction control as a safety-critical circuit. When in doubt, disconnect power and arrange professional service to verify the F/R system, interlocks, and controller health.
Glossary of Key Terms
F/R Control refers to the Forward/Reverse control mechanism in golf carts, allowing the operator to switch between driving forward and reversing. This control is typically a lever or switch located on the dashboard, and its proper operation is crucial for safe maneuvering. A solenoid is an electromagnetic switch that engages the cart’s motor to either drive forward or backward. When the F/R control is activated, the solenoid directs electrical current to the motor, enabling movement in the selected direction. The throttle is a system that regulates the power supplied to the motor, impacting the cart’s speed and acceleration. In electric golf carts, the throttle often works in conjunction with the F/R control to ensure smooth transitions between forward and reverse. An interlock is a safety feature designed to prevent the golf cart from moving unless certain conditions are met, such as the brake being engaged. This mechanism enhances safety by ensuring that the cart cannot inadvertently be put into reverse while in motion or without proper precautions. For troubleshooting the reverse function, checking the solenoid and F/R control operation is essential. If reverse does not engage, ensure that the parking brake is applied and the key is in the “on” position. Regular battery health checks can also prevent operational issues, as a low charge may impact performance.
Always consult the golf cart’s manual for specific instructions related to the F/R control system and safety features.
Quick Summary
To put a golf cart in reverse, locate the reverse switch or lever and engage it while ensuring safety precautions are followed.
Frequently Asked Questions
What type of battery is compatible with my golf cart?
You can usually find compatibility details in your golf cart’s user manual, but most golf carts use either lead-acid or lithium-ion batteries. Make sure to check the voltage rating, commonly 36V or 48V, before purchasing.
How does heat affect my golf cart battery’s performance?
Excessive heat can lead to battery swelling and reduced lifespan; it is recommended to keep your batteries below 80°F (27°C) for optimal performance. Always monitor for overheating during charging or use.
What is the expected runtime for a fully charged golf cart battery?
The runtime can vary significantly, but a fully charged lead-acid battery typically provides around 30-40 miles on flat terrain. Performance may decrease based on the weight load and terrain conditions.
What safety precautions should I take when charging my golf cart battery?
Ensure to charge your battery in a well-ventilated area and avoid overcharging by using a charger with an automatic shutoff feature. Regularly inspect for any signs of damage or wear to prevent electrical hazards.
When should I replace my golf cart battery?
A lead-acid battery generally needs replacement every 4-6 years, while lithium-ion batteries can last up to 10 years with proper maintenance. Regularly check the battery’s performance and capacity to determine if replacement is necessary.