How To Charge A Golf Cart Battery For The First Time?
Golf cart batteries hate two things during their first charge – the wrong charger settings and too much heat. The good news is you can do a safe first charge in about an hour of prep, plus whatever charge time your battery needs. This guide walks through charging your golf cart battery for the first time, from setup to stop charging and storage.
Charging a golf cart battery for the first time means using the correct charger type and setting for your exact battery chemistry, then watching temperature and venting behavior while you charge. For lead-acid (flooded or AGM), start with the charger set to the manufacturer’s voltage and chemistry, then stop when the charger reaches its full or float stage, typically after the bulk phase and a controlled finish charge.
Key Takeaways
- Identify battery type. Flooded lead-acid, AGM, and lithium have different charge voltages and different full-charge rules.
- Match charger to pack. Set the charger for the battery’s voltage (24V or 48V) and chemistry, not the cart’s motor rating.
- Inspect before power. Check terminals for looseness and corrosion, and confirm the charger cable is intact.
- Charge until the charger says full. For smart chargers, completion is usually indicated by a “full” or “float” mode.
- Monitor heat and smell. Warm is normal, but boiling, heavy gassing, or a hot case means stop and troubleshoot.
- Store correctly after. Keep the battery on a maintenance or float option, or store it in a cool, dry place.
How to Charge a Golf Cart Battery for the First Time

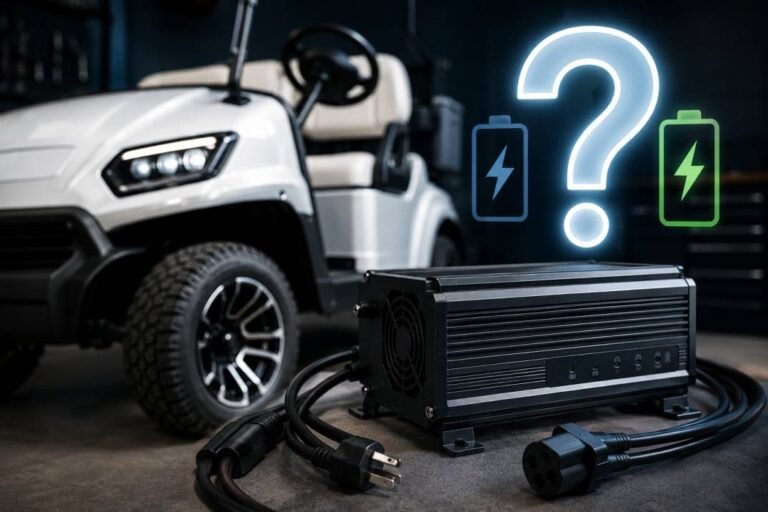
Your first charge should be straightforward, but the result depends on one thing: you must use the correct charger for your battery’s voltage and chemistry. If you guess, you can overheat a lead-acid pack, undercharge it so it never recovers, or confuse a lithium BMS (battery management system) with the wrong profile.
Start by verifying what you actually have. Look for the battery label that says 6V or 8V (lead-acid), or the pack rating for lithium, and note the system voltage your cart uses – commonly 36V, 48V, or 72V. Then match that to your charger output. If you do not have documentation, do not “test” settings. Read the label on each battery in the pack.
For a first-time setup, clear the area and make it easy to monitor. Charge outdoors or in a garage with ventilation, away from flames and sparks, because flooded lead-acid batteries can vent hydrogen gas during charging. Wear eye protection and keep metal jewelry off your hands, because a dropped wrench across terminals can weld itself in place.
What you need before you plug in
- Correct charger for the battery chemistry (flooded lead-acid, AGM, or lithium)
- Correct charger output voltage for the pack, or a charger that supports multiple voltages
- Clean cables and terminals, plus a way to verify terminal polarity
- A place to leave the charger undisturbed while you check it periodically
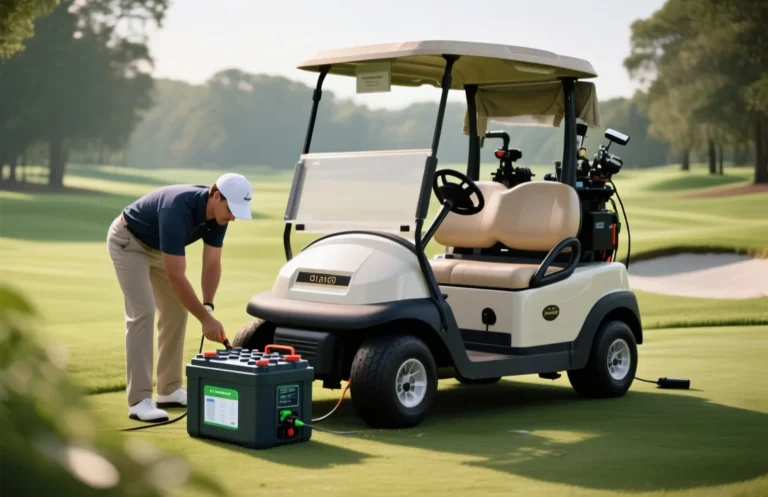
Now do the actual first-charge workflow. If your cart has onboard charging, use the charger’s included instructions and the battery-appropriate mode setting. If you’re charging externally, which is most common, focus on three things in order: safe electrical connection, correct charging profile, and monitoring until the charger indicates completion.
What charger settings to use for your battery type
The charger setting you need is the one that matches your battery chemistry, not the one that “sounds right.” Lead-acid batteries are designed to be charged at higher voltages than their resting voltage, but each chemistry has a specific safe range. Lithium packs need a dedicated LiFePO4 profile, and many lithium chargers refuse unsafe voltages by design.
Here’s how to choose settings in practice:
- Flooded lead-acid (FLA). Use a charger profile labeled for flooded lead-acid, sometimes “wet cell.” Bulk charging brings the battery up, then the charger typically transitions to a finish and then a lower float or hold level.
- AGM (Absorbent Glass Mat). Use the AGM profile if available. AGM usually wants a different absorption and float voltage than flooded cells, and charging it like flooded can cause excess gassing and dry-out over time.
- Lithium (LiFePO4). Use a LiFePO4 lithium profile and keep the charger output voltage aligned to the pack voltage. The BMS controls charge acceptance, so the charger must be a lithium-capable model. Many lead-acid chargers are not compatible.
Even within lead-acid, voltage is not optional. Your charger must match the pack voltage, commonly 24V or 48V carts. If your battery set is wired as 24V, for example two 12V equivalents in series for a nominal system, your charger must be a 24V charger. A 12V charger on a 24V pack won’t complete correctly, and a too-high-voltage charger can damage it.
Charger setting
- Confirm your cart’s system voltage (24V, 36V, 48V, etc.).
- Confirm battery chemistry (flooded, AGM, lithium).
- Set the charger to the matching mode (FLA/AGM/LiFePO4 or equivalent labels).
- Set amperage or current if the charger provides a choice.
- Verify polarity if the charger requires manual connection order.
If your charger has a battery type selector but your battery label contradicts it, stop. The correct path is matching the battery manufacturer’s guidance or the label values on the battery. For lithium specifically, don’t use a generic “golf cart” charger that only guesses at chemistry.
How to connect the charger safely the first time

Safe connection is mostly about avoiding shorts and reversed polarity. The most common first-time mistake is connecting clamps the wrong way around, or letting a clamp touch the wrong terminal while you’re still positioning it.
Before you connect anything:
- Turn the charger off, or unplug it from the wall, while you clip on the battery leads.
- Make sure the battery area is dry and not surrounded by spilled water or electrolyte.
- Check that you have the correct clamps for positive (+) and negative (-) terminals.
Then connect in this order for typical external charging:
- Attach the positive (red) clamp to the positive terminal.
- Attach the negative (black) clamp to the negative terminal, or the charger’s specified grounding point, depending on your charger.
- Route the cables so they cannot get pinched under the cart or snagged.
- Plug the charger into the wall only after the clamps are secured.
If your charger uses a plug-and-receptacle setup, the safety rules are the same, but the mechanical risk is different. Make sure the plug is fully seated, check the receptacle for corrosion, and avoid charging in a wet environment where water can enter the connector.
What “safe” looks like during the first connection
- Clamps are snug, not dangling.
- No sparking at the moment of connection.
- No burning smell, no melting insulation, no visible arcing.
- Charger lights indicate the expected mode, not an obvious fault or alarm.
If you see sparking or the charger immediately goes into an error state, unplug and re-check. Do not keep trying different clamp positions, because repeated shorts can damage the charger and the battery.
How long to charge a golf cart battery initially
Your initial charge time depends on two variables: how deeply discharged the battery is and whether your charger is a smart multi-stage unit. A deeply discharged lead-acid battery can take noticeably longer than a partially discharged one, because the charger spends a lot of time in the bulk stage getting the battery up safely.
Rather than guessing hours, use the charger’s completion behavior as your primary timer. Most modern golf cart chargers are designed to move through stages and then stop or switch to a lower maintenance mode. Leaving a battery on a charger that can float indefinitely is different from leaving it on a charger that keeps pushing current.
A practical way to estimate for a first charge:
- If your charger is a smart multi-stage model, plan for “until full,” and then confirm it reaches the charger’s full or float indication.
- If your charger is older or manual, with no real completion logic, assume you need to be more strict and use the battery manufacturer’s instructions as a guide, because a manual timer can overcharge when the battery is already full.
How to avoid the overnight accident
The safest rule for first charging is simple: do not walk away for many hours without checking the behavior at least once. Check after the early part of the charge, after the battery has started warming but not long enough to be in sustained overheat. If the battery is boiling, venting heavily, or the case is getting unusually hot, you’re likely using the wrong chemistry profile or voltage.
What to check during charging for safe operation

During the first charge, check three things: temperature, gases or smell, and electrical stability. Most problems show up as the wrong kind of heat or the wrong kind of gas, especially with flooded lead-acid batteries.
Check periodically:
- Battery temperature. It should be warm but not scorching. If the battery is getting too hot to comfortably touch the case area, stop.
- Vent behavior (flooded lead-acid). Mild gassing can happen, but aggressive venting, heavy bubbling, or a strong acid smell is a red flag.
- Charger behavior. A smart charger should progress through its stages and end in “full” or “float.” If you see an error indicator or constant alarm, stop and troubleshoot.
Also look for physical issues:
- Wires and clamps should stay cool relative to the battery.
- Terminals should not show new arcing, melting plastic, or a growing corrosion bloom.
- The charger should not smell overheated, like burning electronics.
Quick safety stop rules
Stop charging immediately and investigate if you see:
- Boiling or heavy gassing during a stage where it shouldn’t be that intense
- Battery case heat that feels too hot to hold your hand near for a moment
- Burning smell from the battery or charger
- Charger fault lights or repeated fault cycling
For lithium packs, boiling is not the typical failure mode, but overheat and charger mismatch still matter. If a lithium pack or charger is unusually hot, or the charger refuses to complete normally, stop and verify settings and compatibility.
How to confirm the battery is fully charged
You confirm full charge by using the charger’s end-of-charge signal, not by watching the battery for a random magic number. The exact measurable voltage depends on battery chemistry and charging stage, and chasing a voltage without the right temperature compensation can lead to wrong conclusions.
For the common setups:
- Smart lead-acid chargers (flooded/AGM). Full is usually indicated by a “full,” “charged,” or transition to a maintenance or float mode. Float mode is the charger telling you it is holding at a safe level rather than continuing bulk charging.
- Smart lithium chargers. Full is usually indicated by a “charged” light or completion message. The lithium BMS limits acceptance when the pack is near full, but you still want the charger’s completion logic.
If your charger does not provide a clear “full” indication, your safest next move is using the battery manufacturer’s guidance for how long initial charging should last for your specific battery capacity (amp-hours). Manual chargers are where people get into trouble, because there is no reliable stop signal when the battery reaches saturation.
A practical full-charge verification routine
- Wait for the charger’s “full” or “float/maintenance” state.
- Let the charger finish its final stage normally. Do not interrupt mid-transition as a habit.
- After stopping, check the battery for reasonable temperature stabilization. It should not keep climbing.
If you need to measure, use a multimeter or battery monitor designed for the chemistry and system. For lead-acid, voltage changes with temperature and rest time. For lithium, voltage alone can look nearly full before the charger’s completion conditions are met.
When to stop charging and how to store it
Stop charging when the charger indicates completion, or earlier if you hit a safety stop rule. For first-time charging, I recommend treating completion as the moment the charger switches states, for example to float or maintenance, rather than a fixed number of hours.
After you stop:
- Disconnect clamps in the reverse order from connection – remove the negative clamp first, then the positive.
- Wipe away any moisture or residue if present, especially around terminals.
- Check terminal tightness and corrosion level.
Storage matters because batteries self-discharge. If you have a place to store the battery for weeks, keep it on a compatible maintenance charger, if your setup supports it safely. If you are storing without a charger, store in a cool, dry spot and check it periodically. Leaving a lead-acid battery sitting fully discharged for long periods can damage it, and lithium packs generally prefer being kept within their safe state-of-charge range when stored long-term.
Storage do’s and don’ts
- Do store in a dry, ventilated area.
- Do keep terminals clean and protected from corrosion.
- Don’t cover a flooded battery in a way that traps vented gas.
- Don’t leave a manual timer charger running “just in case.”
FAQ
How do I know what charger setting to pick for my golf cart battery?
Use the charger’s battery type selector (flooded, AGM, or LiFePO4) and match the charger voltage to your cart’s system voltage, commonly 24V, 48V, or 36V. If the charger only lists one chemistry, it may not be compatible with your battery type. When in doubt, read the battery label and match the chemistry.
How long should my first golf cart battery charge take?
Charge time depends on how discharged the battery is and whether your charger is smart and multi-stage. With smart chargers, fully charged is usually when the charger reaches its full or float or maintenance stage. For manual chargers without clear completion logic, follow the battery manufacturer’s guidance for your capacity to avoid overcharging.
Is it safe to charge a golf cart battery in a garage?
It can be safe if the area is ventilated and you keep ignition sources away. Flooded lead-acid batteries can release hydrogen gas during charging, so ventilation matters. Keep the charger and battery dry, and never smoke or use open flames nearby.
What is the most common first-time mistake when charging golf cart batteries?
Using the wrong charger profile, for example charging AGM like flooded, or using a lead-acid charger setting on a lithium pack. The second most common mistake is leaving clamps connected to the wrong terminals or reconnecting while plugged in. Turn the charger off or unplug before attaching clamps.
Can I use a car battery charger to charge my golf cart battery?
No, not as a default. Car chargers are usually not designed for the battery chemistry and safe charging profiles used by golf cart batteries, and they may overcharge. If you do not have a charger specifically designed for golf cart batteries and your exact chemistry, buy or use the correct type.
Next
Check your battery label for chemistry and system voltage, then set your charger to match. If you share your battery type (flooded, AGM, lithium), pack voltage, and charger model, I’ll help you pick the exact settings and a safe first-charge stopping point.