
How do you hook up golf cart batteries?
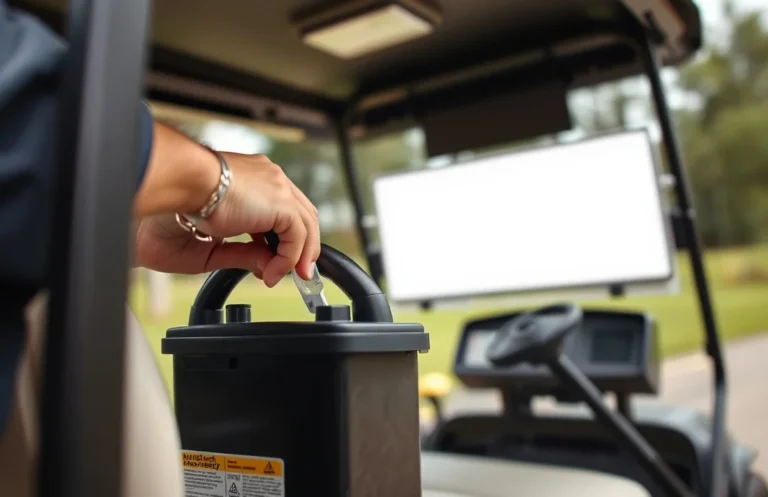
Safety first, disconnect the charger, remove jewelry, and wear eye protection before you touch battery terminals. The single spec that matters most is system voltage, so confirm whether your cart is 36V or 48V and check each battery’s voltage label. A common mistake is mixing voltages or old and new batteries, so check the battery and charger labels first.
Hooking up golf cart batteries means wiring enough batteries in series to reach the cart’s required voltage; for example, use six 6V batteries for a 36V system or eight 6V for 48V. Connect batteries positive-to-negative along the chain, attach pack positive to controller positive, verify polarity, and use a charger rated for the pack.
Safety and Tools Checklist
Wear acid-resistant gloves, splash goggles, and long sleeves before you touch any golf cart battery, and remove rings, watches, and metal jewelry. Make sure the cart key and charger are both off and that you have a planned partner or clear escape path before beginning.
| Item | Amount / Specification | Notes |
|---|---|---|
| Personal protective equipment | Gloves, goggles, long sleeves | Acid-resistant gloves and splash goggles are required; wear a face shield for battery removal. |
| Insulated hand tools | Wrench set, pliers, socket set | Use insulated handles to reduce short risk, and a torque wrench if terminal torque is specified by the manufacturer. |
| Multimeter | 12 V DC capable | Used to verify individual battery voltage and to confirm bank voltage before connecting the charger or controller. |
| Battery brush / cleaning supplies | Wire brush, baking soda, clean rags | Baking soda neutralizes small acid spills; keep water for rinsing and skin flushing. |
| Lifting aid | Battery strap, hoist, or two people | Golf cart batteries are heavy. Use mechanical help to avoid injury. |
| Fire extinguisher | Class ABC or BC | Keep one within reach and know how to use it before starting work. |
| Emergency gear | Eyewash, first aid kit, baking soda | Flush eyes with water for at least 15 minutes and use baking soda for acid neutralization of spills. |
| Charger & cables | Manufacturer recommended charger, heavy gauge cables | Verify charger voltage matches the battery bank nominal voltage and that cables are free of corrosion and rated for the current. |
| Workspace | Level, ventilated, non-conductive surface | Work outdoors or in a well ventilated area, keep away from open flames and sparks. |
Set up the workspace so you can move batteries without twisting or dropping them, with good lighting and a flat surface to keep terminals from shorting. Avoid enclosed garages with poor ventilation, because charging and equalizing can release flammable gases.
Check the battery labels and the cart manual before touching wiring: confirm nominal voltage, group size, polarity markings, manufacture date code, and any wiring diagrams. If the manual specifies torque values for terminals or a required wiring order, follow those values exactly.
Emergency prep: place your fire extinguisher and neutralizer within reach and test that your eyewash supplies are full. Have a phone or radio nearby and a second person aware of the work, even if they will not assist directly.
Golf Cart Battery Basics
Golf carts use battery packs made from flooded lead acid, AGM, or lithium batteries; the individual modules are commonly 6 volt, 8 volt, or 12 volt units that combine to meet the cart’s required pack voltage. Capacity, measured in amp-hours, controls how long the cart will run at a given load, while chemistry and terminal type determine charging rules and physical fit.
Flooded wet-cell batteries are the traditional choice, they cost less but need periodic watering and equalization charging to keep cells healthy. AGM batteries are sealed lead acid, require no watering, and tolerate vibration better, but they still need a charger programmed for lead acid chemistry. Lithium (LiFePO4 or similar) weighs far less and can accept faster charging with a battery management system, however the charger and BMS must be compatible and you must not mix lithium with lead acid in the same pack.
Nominal voltages matter because your cart expects a specific pack voltage, listed on the controller or in the owner manual. Common pack voltages are 36V, 48V, or 72V, achieved by combining multiple 6V, 8V, or 12V batteries. Always read the cart label or service manual to confirm the required pack voltage before buying or connecting batteries.
Capacity, written as amp-hours (Ah), is how much charge the battery stores. Runtime at a given speed and load is roughly battery Ah times nominal pack voltage, which gives watt-hours, divided by the cart’s average watt draw; use this relationship to compare packs but verify real-world numbers with the cart’s specs.
Series vs Parallel Wiring
Series wiring increases pack voltage by adding each battery’s voltage end-to-end, while parallel wiring keeps the pack voltage the same and increases usable amp-hour capacity by combining positive terminals together and negative terminals together. Choose series when the motor and controller require a higher system voltage, and choose parallel when you need longer range at an existing system voltage.
Series raises voltage, so current draw for the same power falls, but individual battery current stays the same as the pack current. Parallel keeps voltage constant, so pack current capability grows and individual batteries share the load, but imbalance between batteries is more likely without matched cells and good interconnects.
For example, six 6V golf cart batteries wired in series make a 36V pack; six 8V batteries in series make 48V; four 12V batteries in series also make 48V. To increase capacity at 48V, you can build two identical 48V series strings and tie them in parallel, but the strings must be the same battery type, age, and amp-hour rating.
Safety reminder: verify voltages with a meter after wiring and before applying load, wear eye protection, and keep metal tools clear of terminals. If you are unsure about the controller, charger, or correct pack configuration, consult the vehicle manual or a qualified technician rather than guessing.
Step-by-Step Hookup Procedure
Always isolate power and turn off the charger and key switch before touching any terminals; remove jewelry and wear eye protection and insulated gloves. When removing or installing batteries, disconnect the main negative or ground connection first to reduce the risk of a short.
Charger Compatibility and Setup
Match the charger’s nominal output voltage to the total pack voltage and pick a charger with an algorithm that matches the battery chemistry, or the pack will not charge properly and could be damaged. Also choose a charge current appropriate for the pack capacity, typically expressed as a fraction of the amp-hour rating, and confirm the charger has the modes you need, such as bulk, absorb, float, and equalize for flooded lead-acid.
On-board chargers that are factory-mounted are convenient and wired for that cart, but they are harder to replace or upgrade and may heat the compartment. Off-board chargers are portable, easier to replace, and can be used across multiple carts, but need a safe place to sit during charging and a compatible connector to the cart.
| Charger Label Item | Why it matters |
|---|---|
| Nominal output voltage | Must match pack voltage to avoid undercharging or overcharging. |
| Output current (A) | Controls charge speed and heat; oversized current can shorten battery life. |
| Chemistry/mode | Ensures correct charge algorithm for battery type. |
| Equalize/temperature compensation | Needed for flooded cells, prevents overcharge at high temps. |
| Safety marks | Shows basic safety and regulatory testing was performed. |
Always confirm charger settings against the battery manufacturer’s manual before first charge, and treat safety warnings seriously. If specs are unclear, contact the battery or charger manufacturer rather than guessing.
Cable, Terminal, and Torque Guidance
Pick cable and terminals that match the system current, battery voltage, and cable run length to keep voltage drop and heat low; poor choices raise resistance, shorten runtime, and can create safety hazards. Always follow the amp draw chart for your motor and accessories, and use the battery or vehicle manual for terminal and clamp specifications.
Safety warning: If a cable or terminal shows melting, severe corrosion, swelling, or repeated loosening, stop use and replace parts with correct rated components. Always verify specs on the battery and vehicle manual when in doubt, do work with gloves and eye protection, and isolate batteries before touching connections.
Maintenance and Replacement Triggers
Regular maintenance keeps a golf cart battery bank balanced and prevents premature failure, so check electrolyte levels, individual battery voltages, and terminal tightness before you hook up the pack. Replace or service batteries at the first signs of swelling, persistent low voltage, or repeated rapid capacity loss, because one weak cell can ruin an entire series string.
For example, if a 48 volt string has one 6 volt battery that drops sharply under even light load, that single weak battery will limit the whole pack’s performance. Replacing that weak battery with one of equal type and age, or replacing the entire set if ages vary widely, prevents repeat failures.
Troubleshooting Connection Issues
If a golf cart shows no power or uneven performance, most faults are simple connection problems: loose, corroded, or reversed leads, a weak individual battery in a series string, or a charger that is not delivering correct voltage. Start by visually inspecting terminals and then confirm pack and individual battery voltages with a multimeter before swapping or replacing batteries.
Call a licensed technician if you see bulging or cracked battery cases, persistent charger failures, repeated thermal events, signs of internal shorting, or if you are unsure how to rewire a series pack safely. A pro can perform load testing, safely swap batteries in matched sets, and handle hazards like hydrogen venting or sealed battery failures.
Quick Summary
Hook golf cart batteries in the correct series or parallel arrangement so total voltage matches the cart, observing polarity and safety procedures.
Frequently Asked Questions
How do you hook up golf cart batteries in series or parallel for the correct voltage?
You wire identical batteries in series to add voltage, for example six 6V batteries in series make a 36V pack, and you only parallel batteries if they are the same voltage and capacity. You can label each battery and use the cart manual to confirm the required pack voltage before wiring.
How do you hook up golf cart batteries safely to avoid sparks or acid exposure?
You disconnect the charger and key, wear eye protection and gloves, and connect positive terminals first then negative last using insulated tools, keeping people and jewelry away from the terminals. Remember hydrogen becomes explosive near 4% volume in air, so always charge in a well ventilated area.
How do you hook up golf cart batteries to prevent overheating during charging?
You mount batteries with clearance for airflow and stop charging if temperatures rise above 120°F (49°C), and you can use a charger with temperature compensation or a battery temperature sensor. You should also avoid charging in direct sunlight or inside enclosed hot spaces to keep heat down.
How do you hook up golf cart batteries to maximize runtime and estimate how long they will run?
You size the bank by amp-hour (Ah) capacity and wire to the correct pack voltage, for example a 100 Ah 36V pack supplying 25 A would run about 4 hours because runtime equals Ah divided by amps. You can estimate runtime by dividing pack Ah by your cart’s average draw and then verify with the cart spec sheet.
How do you hook up golf cart batteries without making common buying or wiring mistakes?
You should only use batteries that match the cart voltage and capacity, do not mix voltages like 6V with 12V, and avoid mixing old and new batteries in the same bank. You can check date codes and battery labels before buying to ensure compatibility and longer service life.